Flutes and Veggies
  • Home - Winter
  • About
  • Why vegan?
  • recipes
  • Contact
  • Resources

Flutes and Veggies

Easy Bread Machine Sourdough Ciabatta

vegan, nut-free (potentially)

Loosely based on a recipe on Allrecipes
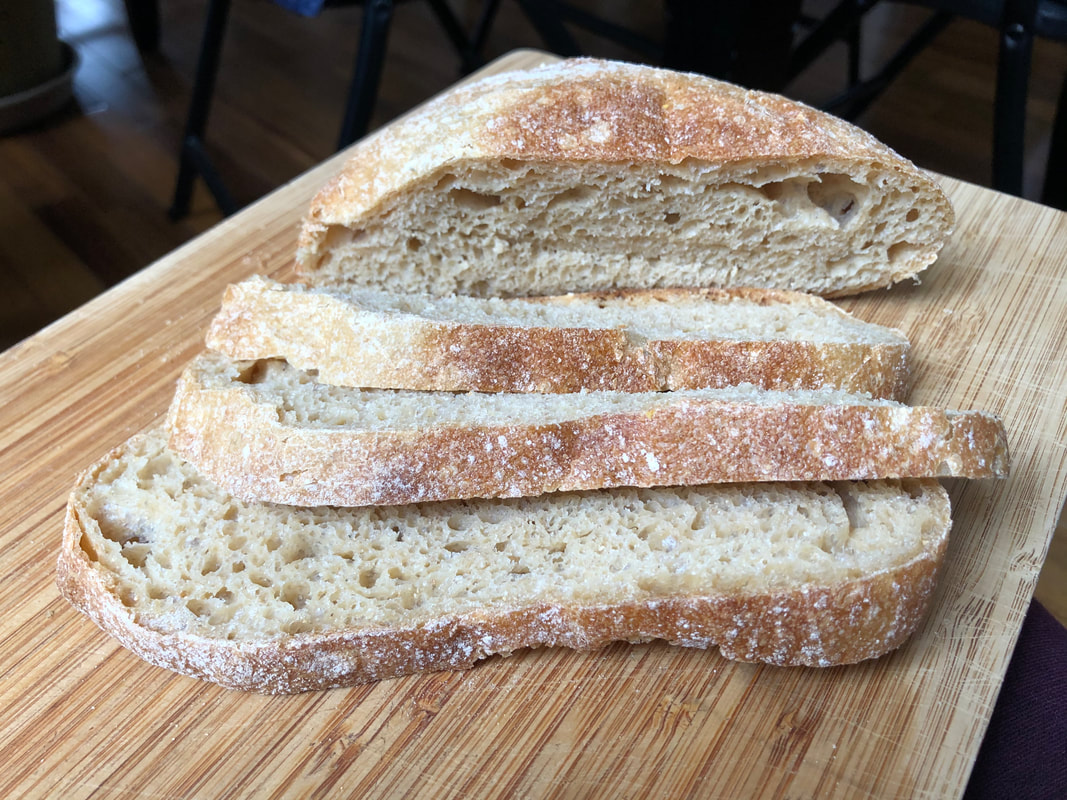
This bread is quite easy to make and still gives you that nice airy texture and crispy crust that you'd expect from an artisan bread. A bread machine does the kneading work and the addition of yeast speeds up the rising time, so you don't have to plan your entire day around it. If you have an active starter, you'll have freshly baked bread in less than three hours!
Picture
Picture
Picture
Picture
Yield: 2-3 loaves (serves 18)/ Active time: 20 minutes / Total time: 2 hours 45 minutes
Helpful Tools:
  • kitchen scale (for more accurate measurements, but I've included volume measurements in case you don't have one)
  • bread machine
  • dough scraper
  • Dutch oven OR cast iron skillet + oven-safe lid OR roasting pan + lid
​
Ingredients:
For the dough
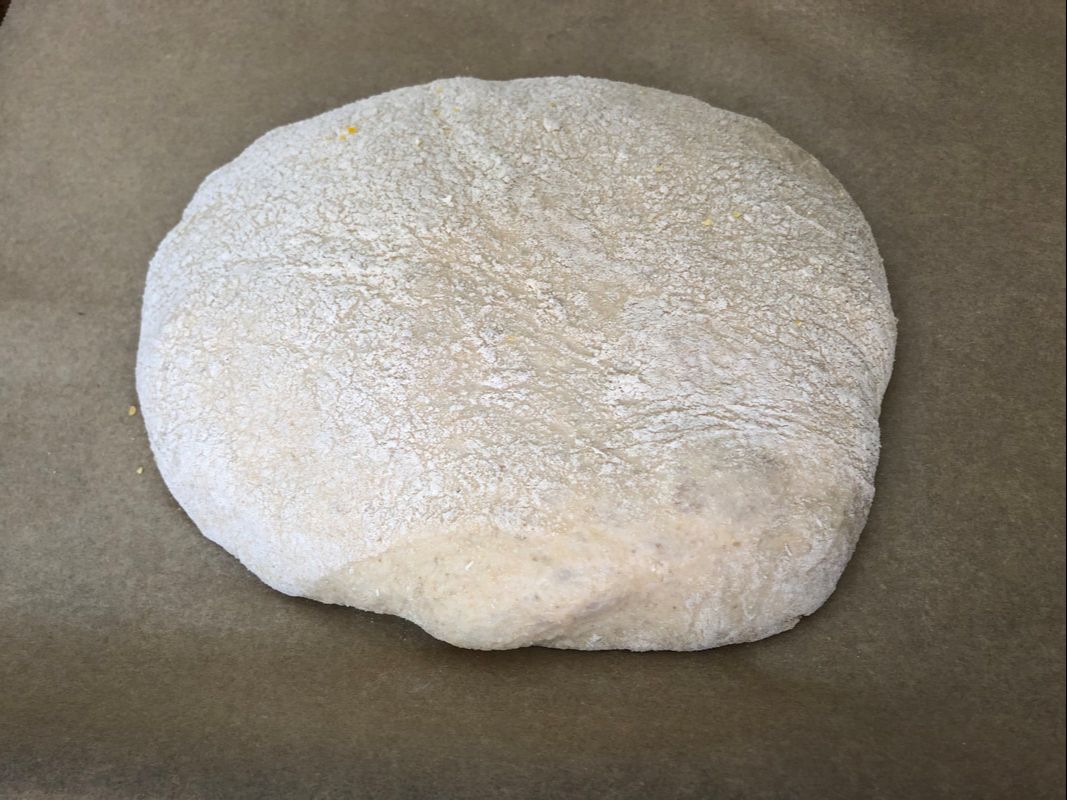
  • 1 ½ cups (355 g) warm water
  • 1 tablespoon (15 g) non-dairy milk
  • 1 tablespoon (13 g) olive oil 
  • 1 cup (227 g) sourdough starter
  • 1 teaspoon (4 g) white sugar
  • 1 ½ teaspoons (8 g) salt
  • Depending on the type of flour you have, use one of the following:
  1. 3 ¼ cups (510 g) bread flour OR
  2. 3 ¼ cups (600 g) all-purpose flour + 3 tablespoons (27 g) vital wheat gluten (optional - just add more flour if leaving out)** OR
  3. 3 ¼ cups (483 g) whole wheat pastry flour + 3 tablespoons (27 g) vital wheat gluten (optional - just add more flour if leaving out)**
  • 1 ½ teaspoons (6 g) active dry yeast
For shaping the loaves
  • Extra flour
  • Cornmeal, optional


Directions:
  1. Place bread machine pan on your kitchen scale and add water, non-dairy milk, olive oil, sourdough starter, sugar, salt, flour, optional vital wheat gluten, and yeast in the order listed. Place pan in bread machine and start Dough cycle. Remove pan from the machine after the cycle is complete.***
  2. Turn dough out onto a well floured surface and let rest for a few minutes. Line two cookie sheets with parchment paper. Sprinkle some cornmeal on the parchment for extra crunch, if desired.
  3. Flour hands and a dough scraper well before handling the dough, but try not to add too much extra flour to the dough itself. Using the floured dough scraper, divide dough into 2-3 individual sections sized according to your baking vessels and shape gently into round loaves. (I have a large cast iron skillet and a small cast iron skillet that will fit side-by-side in the oven, so I like to make one large loaf and one small loaf). Use the dough scraper to transfer the loaves onto the parchment paper and cover with large bowls or lids that won't touch the dough. Let rise in a warm place for about 60 minutes.****
  4. Place a Dutch oven or cast iron skillet(s) on the lowest rack of the oven and preheat to 450 degrees F (230 degrees C). You may need to remove the top rack from the oven so there's enough room to fit the cooking vessels plus their lids - It's much easier to try it all out while the oven is still cool!
  5. With oven mitts on, remove the Dutch oven/skillets and carefully lift each loaf by the ends of the parchment paper and transfer to the hot Dutch oven/skillet. With oven mitts on again, transfer filled cooking vessel(s) into the oven and place the lid(s) on (see photo below for my set-up).
  6. Bake in the preheated oven until loaf is golden, about 20 minutes. Remove lids and continue baking until top is golden brown, 2 to 5 minutes more. Lift up each loaf by the ends of the parchment paper and place on a towel to cool. If you were only able to fit one loaf in the oven, bake remaining loaves in the same way.
  7. For best results, allow loaves to cool completely before slicing. If you can't wait, go ahead and slice into it warm, but be warned that slicing too soon will make it go stale faster, so you'll need to go ahead and eat the entire loaf :)
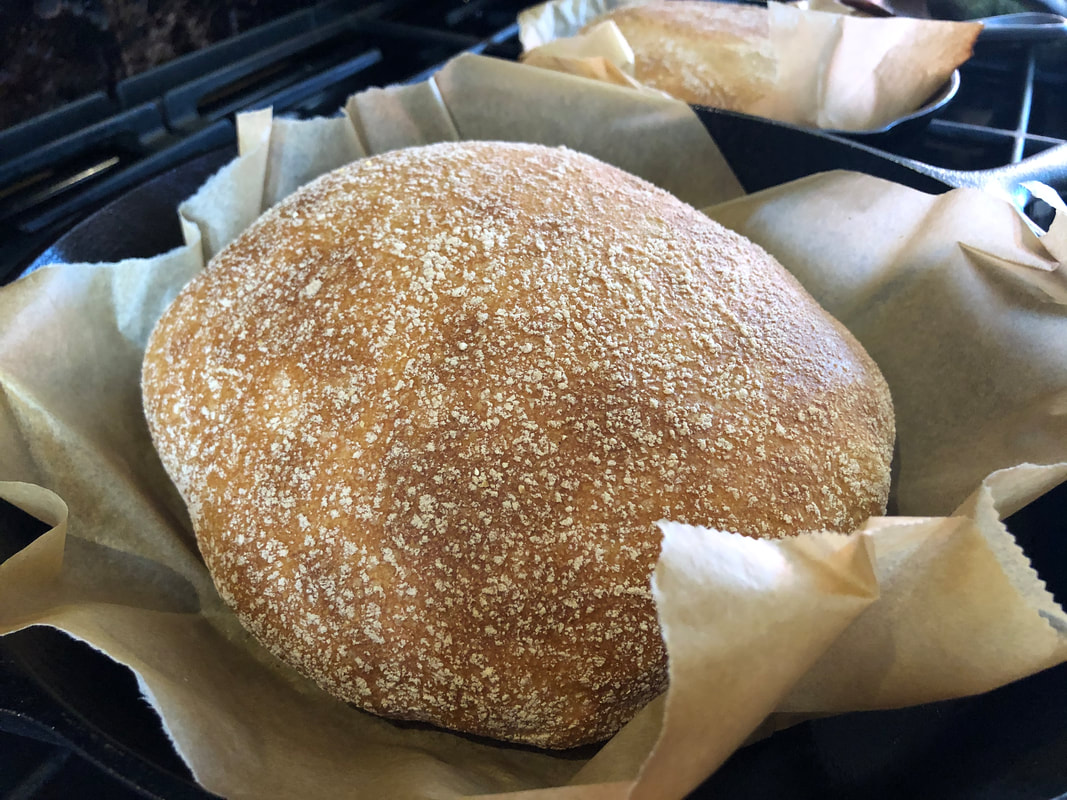
*Dutch ovens help the bread retain moisture as it bakes, but if you don't have one, you can get by with other creative solutions. I still haven't gotten around to buying one yet as I know it would take up a lot of space in my already cramped kitchen. I've found that using a cast iron skillet with a roasting pan lid or even a cookie sheet as a lid works quite well. 
**You can use whatever flour you have on hand, and it should still turn out fine. The vital wheat gluten is optional, but it does give the bread a nice chewy/stretchy texture.
***Most bread machines take around an hour to complete a dough cycle, so here's you're first stretch of freetime!
****If it's cool in your kitchen, place them in the oven with the light on to aid in rising.
Picture
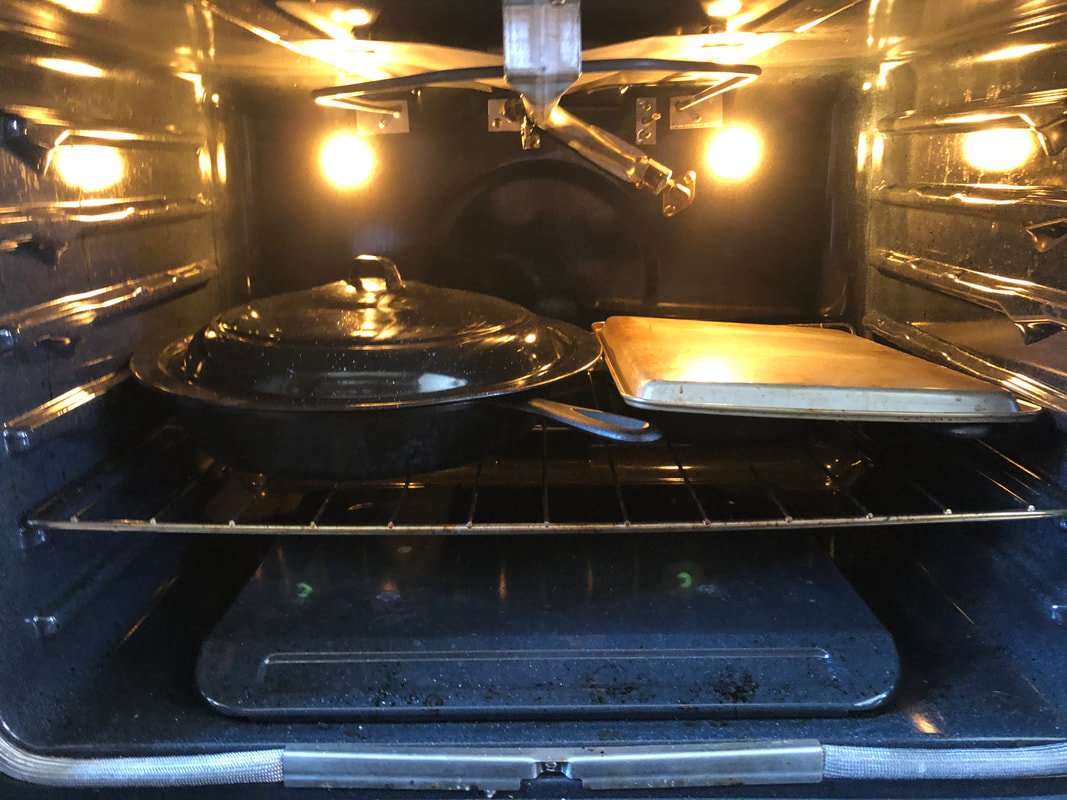
A large oven-safe canning pot lid and a small cookie sheet act as lids for my cast iron skillets
Picture
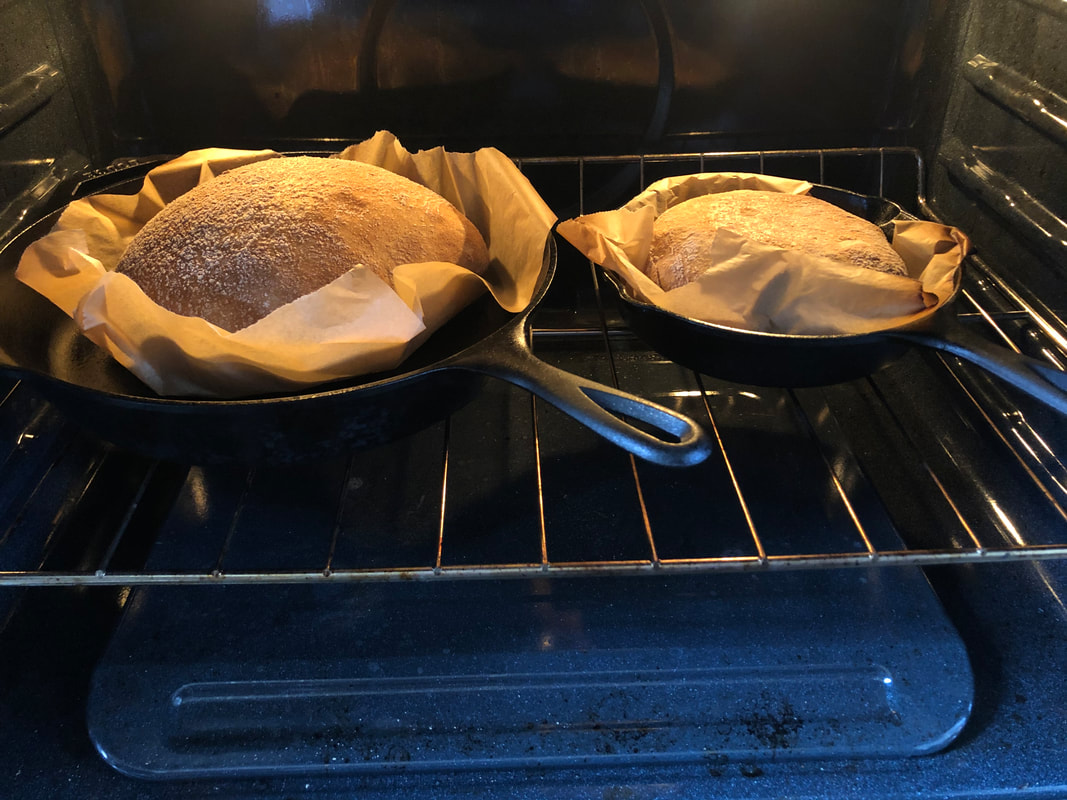
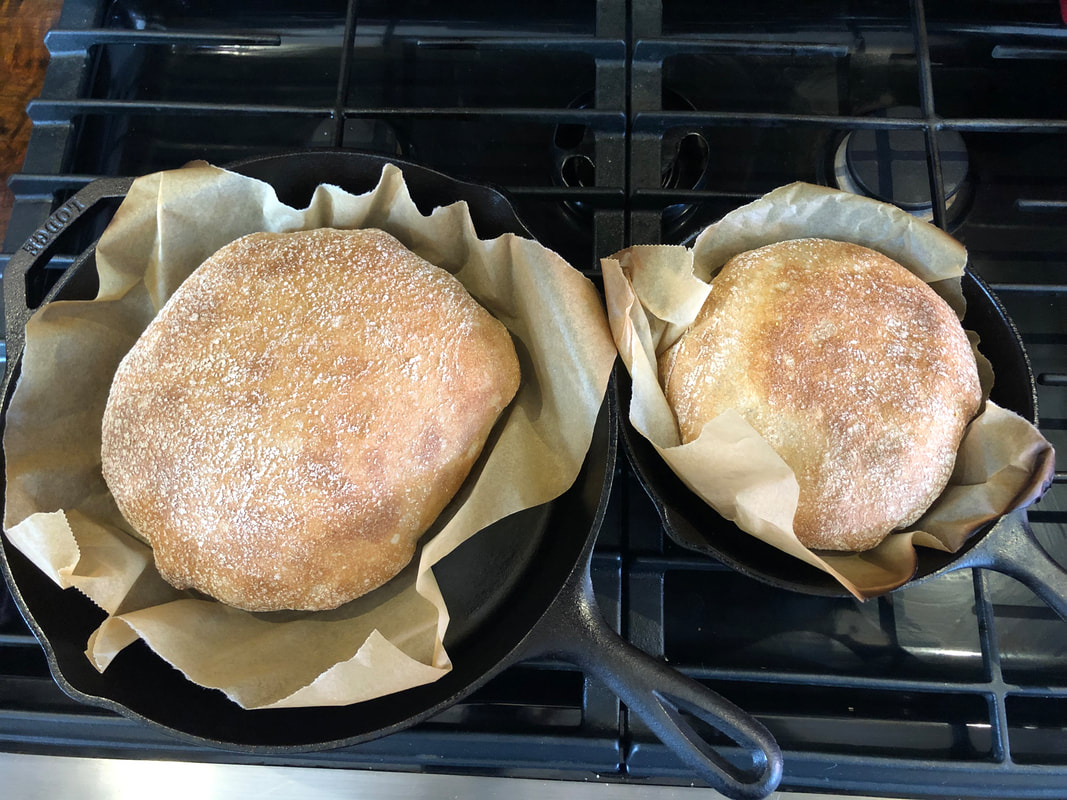
Two cast iron skillets happen to fit side-by-side in my oven so I can bake two loaves at once
Picture
Stay updated by following @FlutesAndVeggies on Facebook
© 2017-2024
  • Home - Winter
  • About
  • Why vegan?
  • recipes
  • Contact
  • Resources